环境
系统:centos7
安装apache
#yum 安装apache
[root@localhost ~]# yum install httpd httpd-devel

#启动httpd服务
[root@localhost ~]# systemctl start httpd
[root@localhost ~]# systemctl status httpd 
#防火墙设置80端口开放
[root@localhost ~]# firewall-cmd --permanent --zone=public --add-service=http
success [root@localhost ~]# firewall-cmd --permanent --zone=public --add-service=https success [root@localhost ~]# firewall-cmd --reload success 
#查看80端口监听
[root@localhost ~]# netstat -tulp

#浏览器测试

安装mysql
#查看安装包
[root@localhost ~]# yum provides mysql

#安装mysql
[root@localhost ~]# yum install mariadb -y

#安装mysql安装包
[root@nmserver-7 ~]# yum install mariadb mariadb-server mariadb-libs mariadb-devel
#启动服务
[root@nmserver-7 ~]#systemctl start mysql
#数据库安全设置
[root@localhost ~]# mysql_secure_installation
NOTE: RUNNING ALL PARTS OF THIS SCRIPT IS RECOMMENDED FOR ALL MariaDB SERVERS IN PRODUCTION USE! PLEASE READ EACH STEP CAREFULLY!In order to log into MariaDB to secure it, we'll need the currentpassword for the root user. If you've just installed MariaDB, andyou haven't set the root password yet, the password will be blank,so you should just press enter here.Enter current password for root (enter for none):OK, successfully used password, moving on...Setting the root password ensures that nobody can log into the MariaDBroot user without the proper authorisation.Set root password? [Y/n] yNew password:Re-enter new password:Password updated successfully!Reloading privilege tables.. ... Success!By default, a MariaDB installation has an anonymous user, allowing anyoneto log into MariaDB without having to have a user account created forthem. This is intended only for testing, and to make the installationgo a bit smoother. You should remove them before moving into aproduction environment.Remove anonymous users? [Y/n] y ... Success!Normally, root should only be allowed to connect from 'localhost'. Thisensures that someone cannot guess at the root password from the network.Disallow root login remotely? [Y/n] n ... skipping.By default, MariaDB comes with a database named 'test' that anyone canaccess. This is also intended only for testing, and should be removedbefore moving into a production environment.Remove test database and access to it? [Y/n] y - Dropping test database... ... Success! - Removing privileges on test database... ... Success!Reloading the privilege tables will ensure that all changes made so farwill take effect immediately.Reload privilege tables now? [Y/n] y ... Success!Cleaning up...All done! If you've completed all of the above steps, your MariaDBinstallation should now be secure.Thanks for using MariaDB!
#登陆数据库测试
[root@localhost ~]# mysql -uroot -p

安装php
#安装php
[root@localhost ~]# yum -y install php

#安装php拓展包
[root@localhost ~]# yum install php-mysql
[root@localhost ~]# yum install -y php-gd php-ldap
[root@localhost ~]# yum install -y php-gd php-odbc php-pear
[root@localhost ~]# yum install -y php-xml php-xmlrpc
[root@localhost ~]# yum install -y php-mbstring php-snmp php-soap curl curl-devel php-bcmath
测试
#网站发布目录为:
/var/www/html
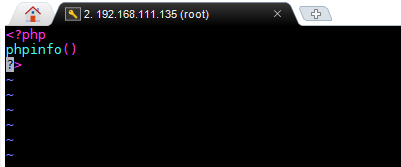
#创建一个php文件并编辑:phpinfo
[root@localhost html]# touch phpinfo.php
[root@localhost html]# vim phpinfo.php

#浏览器访问
